Pages

Sunday, September 4, 2011

Weeks 4-5

August was a looooong month. Although the month is over, I'm still pursuing my challenge for another week, since I had many opportunities wasted with a broken fridge. The cravings have been getting worse. The other day, I put a patient of mine on a diet (meaning I recommended foods and liquids that would be safe for her to eat), and I was just about to break as she was ordering grilled cheese and tomato soup. However, I've stayed strong, and I've made some great things:

Corn Chowder with Sausage and Vegetables (adapted from here)
This is what you do when you get 9 ears of corn from your CSA and need something to do with them. I must say, though, that the kernels of corn were so tender, you could just bite them off the ear without cooking them first.

What you need:
  • 6 cups of cubed potatoes
  • 3 cups water
  • 1 bay leaf
  • 1/2-1 lb pork sausage
  • 1 onion, chopped
  • 1/2 green pepper, chopped
  • 1/2 jalapeño, chopped
  • pinch red pepper flakes
  • 5-6 ears of corn, kernels removed (see picture below for a neat trick for removing kernels)
  • splash white wine (which, according to Michael, every soup can benefit from)
  • 1/4 cup half and half
  • salt and pepper to taste
What you do:

  1. Boil potatoes in water with a bay leaf until tender.
  2. In the meantime, brown sausage and onions in a medium-large saucepan.
  3. When the sausage is brown, remove, and add the green pepper, jalapeño, carrot, and red pepper flakes, and sauté and soften in the sausage fat.
  4. Add the corn and cook for a couple more minutes.
  5. Add the sausage back in and deglaze the pan with the white wine.
  6. When the potatoes are tender, mash them a little bit in their boiling water. Add potatoes and water to veggies.
  7. Add the half and half and heat through.


Michael and I found ourselves listless and bored on a Saturday night (during the second time that my refrigerator was broken). We had some bacon left over from omelets that I had made him that morning, and Michael came up with the idea of making meatloaf (something I had never partaken in before). He had had a couple delicious meatloaf sandwiches before at Monty's Blue Plate Diner, and had found a recipe for their "Meatloaf of the Gods" in their cookbook, which my roommate owns. It calls for oatmeal instead of breadcrumbs, which worked for me, as I was not prepared to make bread, dry it out, and then turn it into breadcrumbs. Our major roadblock was the ketchup. 1 cup needed for inside the recipe and some for putting on top. I had about 1/3 cup of tomato paste in the (working) freezer from our enchilada escapade, but that wasn't going to be enough to suffice. We spent a good 30 minutes racking our brains, trying to figure out what else to do, looking up steak sauce recipes and such, until I realized that I had some homemade barbeque sauce hidden in the freezer from some ribs that Michael and I made after winning them in a Meat Raffle last fall. The combination was perfect; not too barbeque-y, not too tomato-y. I shall say, my first meatloaf experience was a good one.

The next day, I made some pita bread. Man, there is nothing like the smell of fresh bread in your kitchen. I made these with a 2:1 ratio of bread to whole wheat flour, but I think next time I'll either do 1:1 or 1:2. With these, I had made the mistake of forgetting to remove the top rack of the oven, after moving the bottom rack as low as it goes and placing my pizza stone in there (don't worry, Maggie, I keep my pizza stone near the floor). I could only fit two pitas on the stone at a time, and flipping them was a bit of an ordeal. However, they turned out wonderfully, and it was quite fun to watch the pitas puff up. The pitas were great for use in meatloaf sandwiches, which constituted my lunches for most of Weeks 4-5.


This week, I also made Cheez-It style cheese crackers (recipe here). Unfortunately, they didn't last long enough to be captured on my camera. I learned a lesson while making these: do not make them at 10:30pm and decide that it'll be a good idea to use the time while they're in the oven to brush your teeth. Your kitchen will emanate scents of baking cheddar, and you will not be able to resist testing them (you need to make sure they're at a good level of crispness). You won't be able to eat just one, and the cheddar will overrule your teeth-brushing, and you will need to repeat it. I shared these with coworkers, who were amazed at the taste and simplicity, but I was unable to give any to Michael, who consumes more Cheez-Its than any other human I know. I'll make some just for him, maybe for a first day of (grad) school treat.

Sunday, August 28, 2011

Enchiladas and an Exception

First, the enchiladas:


A few Sundays ago, Michael and I made enchiladas. With this challenge being as it is, it took the *entire* day. I started out making tomato paste, which is essentially reducing 5-6 lbs of tomatoes down into about 2 cups of paste. Of course this was the morning that my refrigerator broke for the second time, and only about 1/3 cup made it safely into the freezer. The rest had a one-way ticket to moldsville. Despite the lengthly process, thepaste was actually quite delicious. However, Michael had asked me if there was something I had made this month that I wouldn't make again, and the answer is definitely now tomato paste. It was a lot of time in the making, and wasn't very cost efficient. Maybe I'll make it again some day when I have a garden overflowing with tomatoes and there's nothing else I can think to do with them. If you're interested in taking this journey into tomato paste, here's the link with instructions.


The next step was to make veggie broth. I adapted the recipe from Super Duper Soups, a wonderful cookbook that I had bought on sale a couple years ago. It also has a recipe for the best shiitake mushroom soup that I have ever put in my mouth and hour-by-hour instructions for a one-, two-, or three-day detox plan. I've done the one and the two, but I've never ventured into the three. Maybe that'll come up after the month is over. I have never felt better in my life than the morning after doing a detox. Anyways, this was a great veggie broth, but again, I don't know how often I'll be making my own broths without having 1) a garden and 2) to share a freezer with 2 roommates and a ton of frozen food.

The tomato paste and the veggie broth were made to go into the enchilada sauce that can be found here (on which I based the entire enchilada as well). One note: when it says whisk in broth, whisk in a little at a time, as if you were making a roux. Otherwise, it'll be too liquidy, and you'll have to add some cornstarch to it, because at that point, after cooking all day, you'll be too lazy and hungry to wait for it to thicken on its own.

That aside, I decided to make some queso fresco to adorn the enchiladas, instead of the cheddar jack called for in the recipe. Queso fresco was delightfully easy, much like ricotta, and can be made with materials you may have in your kitchen (milk, white vinegar, and salt), and it takes about 40 minutes, including draining time.


Then onto tortillas! I followed the step-by-step
directions I found here. Again, very simple: masa (corn flour) and water. I read on another site to roll out the tortillas in between cut up ziploc bags instead of saran wrap. I'll second that here. I would definitely make these again, as they were far superior and easy to roll for enchiladas than the store-bought ones (read: they didn't split the second you put them into a concave shape).


Then Michael, the carnivore, added his contribution to the enchiladas by giving some chicken breast a nice flambé in some tequila (sorry about the picture quality; the sun had gone down at this point):


The food was delicious, and it was fun, long day (good thing the PGA finals was on to entertain me). I may not do it all again from scratch, but these were some pretty nice enchiladas. I also made some guacamole and baked some of the tortillas into chips, but I was ready enough to be done at this point, that their pictures do not exist.


And now, the exception:
Last Thursday, I decided to donate blood with the American Red Cross, who comes to my workplace every 8 weeks. I've given twice before, but was unable to the last time they came, as I had research subjects coming in and was unable to sneak away. As you may know, it's important to eat before and after donating blood. However, I had forgotten that they were coming that particular day, and had only packed enough food to eat before. And so after I tried to give blood (the needle slipped from my vein, leaving them with just a little bit of my blood and leaving me with a nasty, < shaped bruise on my arm), I felt a little lightheaded, and so I decided to not risk passing out on the way back up to my office. I ate a run-of-the-mill blueberry muffin with some sugary cranberry juice, and I don't feel one ounce bad about it!

Saturday, August 20, 2011

Week 2-3

So the bad news is that our refrigerator is broken again. It stopped working last Sunday and we still don't have a new one. Our landlord is working on it, but it is really hard to make food when I don't have a lot of fresh ingredients on hand and I can't keep any leftovers. The good news is that I'll be extending my challenge for the first week of September to make up for it! There are too many things on my list of things I want to make and there were too many instances of popcorn-for-dinner this last week. I've traded Michael dinner in order to keep my yummy, fresh, CSA veggies in his fridge, but that makes eating them a little difficult, especially now that he lives across town.

However, I was able to make some gems in Week Two:

Honey Roasted Peanuts (adapted from here)

What you need:
  • 1 lb raw peanuts (found in the baking aisle, usually)
  • 2 1/2 Tbsp honey
  • 1 1/2 Tbsp maple syrup (the real stuff, please)
  • 1 tsp kosher salt, plus more for sprinkling
  • 1/2 tsp vanilla extract
  • 1/4 tsp cinnamon
  • 1/4 tsp ginger powder
  • 3 Tbsp granulated sugar

What you do:
  1. Preheat oven to 350 degrees.
  2. Pour peanuts in a large mixing bowl. Set aside.
  3. Combine honey, maple syrup, butter, salt, vanilla extract, cinnamon, and ginger powder in a microwave-safe bowl. Heat in the microwave until the butter has melted.
  4. Pour the honey mixture over the peanuts and stir well to coat.
  5. Arrange peanuts into one layer on an aluminum foil-lined baking sheet, and bake for 5 minutes. Remove baking sheet from the oven and stir the nuts. Bake for 5-7 more minutes, until the nuts are golden brown. Don't be fooled by the skins on the nuts, look at the nut meat itself.
  6. When the nuts are sufficiently roasted, remove them from the oven and toss in a clean, large mixing bowl with the sugar and some more salt to taste.
  7. Cool completely, and try not to eat the entire batch in one sitting
These nuts were very tasty. They had a nice maple undertone that you don't get with your traditional Planter's honey roasted peanuts. I had intended to make half of this batch into peanut butter, but I ate them too fast. I'll just have to make another batch for peanut butter...


Last Saturday, my roommate Trevor hosted a breakfast celebration in honor of his girlfriend, Sarah, finishing the MCAT. On the menu:
  • strawberry rhubarb muffins (a la Emily)
  • pork sausage with mushrooms (a.k.a. umami overload; by Michael)
  • sourdough pancakes with a fresh berry compote (pictured in-action right, back; implemented by Trevor and Sarah, respectively)
  • hash browns with caramelized onions (pictured right, front; de moi)
  • baked doughnuts (pictured below; recipe here; a Michael & Corinne creation)
  • crisp ginger beer (brewed by Trevor)

So much deliciousness. Here's a quick run-down of what I did to the hash browns:

Hash browns with caramelized onions (did you know hash browns are two words? I always thought it was one...)
What you need:
  • 1 Tbsp olive oil
  • 1 medium onion, minced
  • 1/2 tsp Herbes de Provence (aka the best herb mix ever)
  • pinch salt
  • 1-2 cloves garlic, minced
  • 1 lb potatoes (I prefer red, used here, but good ole Russets will do the job)
  • 2 Tbsp pork sausage grease (or a mixture of butter and olive oil)
  • salt and pepper, to taste
What you do:
  1. Caramelize the onion in the olive oil with the Herbes de Provence and a pinch of salt.
  2. In the meantime, scrub the dirt from the potatoes and grate them (but please don't peel them!)
  3. Place the grated potatoes on a plate lined with a paper towel. Place a paper towel over the potatoes and wring them out over the sink. Be careful for breaking paper towels. Replace the paper towels and let the potatoes "drain" while the onions are finishing.
  4. When the onions are all caramelized and delicious, add the garlic and brown for 1 minute.
  5. Add the grease and potatoes. Stir to combine and sprinkle with salt and pepper to taste. If you have too many potatoes to comfortably fit in the pan, make in separate batches. Just remember to take some of the onions and garlic out for the other batches.
  6. Cook until browned on the bottom, then flip and brown on the other side
101 Cookbook's Baked Doughnuts (recipe followed to the letter from here)

Oh my, these are good. Even Michael thinks so, and he's got high standards when it comes to doughnuts. We made these the night before, and the ones we dipped in powdered sugar had turned into glazed! Words of warning: they take a while to make, since they're yeasted and need time to rise. So don't expect to wake up on a Sunday morning and have doughnuts before you've finished your coffee. They're definitely best fresh out of the oven, but they don't fare bad after a night in storage. They do have a tendency to dry out after a couple days, but can be nuked for a couple seconds if you're in a pinch for breakfast and don't want to have oatmeal, again. Also, if you want a hole in the middle of your doughnut, you'll need a super tiny cutter for it. Smaller than the smallest one that comes in the graded biscuit cutter set.

That night, I made fettucini with a fresh tomato sauce. Although this is not a new recipe, I am delighted to share it here:

Fresh Pasta (adapted from a recipe provided in a pasta making class I took in 2008)

What you need:
  • 9 oz (about 2 cups) AP flour, plus extra for dusting
  • 1 1/2 tsp kosher salt
  • 2 eggs
  • 1-3 Tbsp cold water
  • 1 tsp olive oil
What you do:
  1. Pulse the flour and salt in a food processor.
  2. Crack eggs into a liquid measuring cup. Pour cold water on top of the eggs to make 1/2 cup. This could vary between 1-2 Tbsp, depending on how large the eggs are.
  3. Add eggs and water, along with the olive oil, to the food processor and mix until the dough comes together. It will be sandy.
  4. With the processor running, add 1 more Tbsp of water through the chute. At this point, the dough should come together into a ball. If not (and it has been longer than 30 seconds), keep adding water, 1 Tbsp at a time, until it does.
  5. Turn the dough out onto a lightly floured surface and knead for 10 minutes. Not 5 minutes, and that should be good enough; 10 minutes. Add flour as needed, but don't overdo it. At the end of 10 minutes, the dough should be smooth and sticky enough to make a wonderful smacking sound when pressed, without sticking to your fingers.
  6. Wrap in plastic, and let rest in the fridge (it was functioning at this time) for an hour.
  7. Roll out as desired. You do not need a pasta machine to do this; I have only had mine for a little over a year now. You can watch a video on how to make the super yummy shape trofiette here.
  8. Dry while your pasta water is boiling and cook until al dente. Make sure you salt the water to an adequate degree (more than you'd think), so the flavor is imparted to your noodles.
Three Five Ingredient Tomato Sauce (adapted from here, one of my favorite food blogs)
This sauce is seriously amazing. I've made the three-ingredient version before many times, but once decided to add two additional ingredients, which heightened it beyond belief. I usually keep a bottle of white wine in the fridge (when operational) for cooking purposes, and I talked about my love of Herbes de Provence above. When I made the sauce with fresh tomatoes, it was a little more liquidy than when I had made it from a can, but I was too hungry to let the sauce thicken any more over the heat.

What you need:
  • 2 lbs ripe tomatoes, peeled; or one 28-oz can whole, peeled tomatoes
  • 5 oz unsalted butter
  • one medium onion, peeled and halved
  • salt to taste
  • 1 glug white wine, good enough quality that you can drink it, because you need a glass of wine with you when you cook; it's not fair to yourself to cook with wine and not drink it
  • 1 pinch Herbes de Provence
What you do:
  1. Combine all ingredients besides salt into a medium saucepan, put over medium heat, and slowly simmer for about 45 minutes. Stir occasionally, pressing the tomatoes against the side of your pan with your spoon.
  2. Taste, and add salt as needed. The sauce is ready when the fat separates from the tomatoes. Discard the onion.

Michael and I made enchiladas with everything from scratch (duh) last Sunday, right as the fridge was descending into tepid-ness. It will be a post of its own and will be up in the next few days.

Monday, August 8, 2011

Sunday Picnic

One of the items on Michael's and my summer to-do list was to go for a picnic in Governor Nelson State Park. This time, our focus was more on the picnic than the park, but we'll make use of his state park parking sticker later in the season to check out some of the other park attractions. On the menu: chorizo burgers with a roasted red pepper aïoli and cucumber salsa and sponge cake with fresh whipped cream and berries.

I didn't mess with the original recipes much, so I'll just post pictures and links:

Hamburger Buns (recipe found here)

These buns were super simple to make. I used 1/2 and 1/2 whole wheat and AP flour, and topped them with my "Everything" mix (an assortment of kosher salt, sesame seeds, poppy seeds, and granulated garlic and onion). I made good use of my roommate Emily's KitchenAid stand mixer, and I don't know how I survived without one! The dough hook is my favorite, doing the kneading for me while I can get some other stuff done. I had a lot to do Sunday morning, so I needed to stay up on my dishes. I didn't make them quite as big as traditional hamburger buns, as the recipe called for 12 buns. They were quite dense for hamburger buns, but they were sturdy enough to handle the juicy/oily nature of the chorizo, and the flavor of the buns was right on. I froze 6, and was very tempted this morning to bring one out for breakfast...


Roasted Red Pepper Aïoli (recipe found here)

For the experience and the challenge, I made up this aïoli by hand; just me, a bowl, and a whisk. For those interested in doing the same thing, I would suggest recruiting someone to pour the oil for you. I found myself using the measuring cup to try and steady the bowl as I beat, but then I would splash in the oil a little faster than intended. For a delicious addition to the David Lebowitz recipe, I would definitely recommend freshly roasted red peppers. The acidity of the peppers was balanced really well by the creamy egginess of the aïoli. So many levels of yum. (And for those wondering, our refrigerator came back to a semi-working level, but I bought a new case of eggs for this. No salmonella for us.)

Cucumber Salsa (...or cucumber tomato salad, found here)

I made a cucumber tomato salad to eat as a side dish, but Michael had the brilliant idea to use them as a crunch factor on the burgers. It worked out perfectly, especially because I forgot to bring lettuce and tomato for the burgers. While the balsamic dressing on the salad didn't quite fit the flavor profile of the chorizo, it was a nice complement. In hindsight, it would have been amazing to have some avocado slices to top the burgers. Next time. (And please note the aïoli dripping off the bun in this picture)


Glorious Sponge Cake (I did not make up the name for this recipe)

There are 6 eggs in this cake. Six. And surprisingly for me, no butter. I learned that I'm not that great at separating eggs. And when I was fishing egg yoke out of my bowl of whites, I remembered an episode of Good Eats wherein Alton Brownie (Michael and my moniker for one of our celebrity crushes) was describing the scientific reason why it was paramount that you shouldn't have one bit of yoke in your egg whites during whipping. I can't remember the reason, but it exists out there to haunt me. I also learned why angel and sponge cakes are commonly baked in springform pans. Save the lecture; just don't bake it in a bundt pan, unless you want to be scrubbing out sponge cake bits, even after you've let the pan soak all night.

All in all, it was a successful picnic! After eating all of this rich, heavy food, I treated myself to a 4-hour dance rehearsal. I'll just say it wasn't as bad as eating Thai food before dance rehearsal... Some more pictures from the day:

Grillmaster Flash


Saturday, August 6, 2011

Week One

I'm coming to the close of Week One of my challenge, and I've had a lot of fun. I may have been more fruitful in my food preparation, but as of Wednesday, my refrigerator has been out of commission. Although my roommates and I have been playing the "keep the door open as little as possible to keep the cool in" game, the 80+ degrees August weather is not helping anything. It was sad to find my heavy cream as a solid and to clean out bags of brown-ish liquid from the produce drawers... We're going to try defrosting the entire thing today to see if that won't fix the problem.


I ran into a dilemma this week regarding my dining-out allowances. On Tuesday, I went toThe Old Fashioned with the med students who have been working in my lab this summer (thanks for all your help Chloe, Price, and Zubin!). We started things off right with an order of fried cheese curds, paired with the Spanish Smoked Paprika dipping sauce. I must admit, the sauce may have overthrown my favorite sauce, Tiger Blue (a mix of a horseradish-based Tiger sauce and blue cheese dressing). And for a truly decadent entree, I decided on the No. 51 Mac & Cheese with Wisconsin sharp cheddar and Sarvecchio, topped with breadcrumbs and served with pickles on the side. It's so rich that it's a challenge to eat it all in one sitting, and since it was a late dinner, I wanted to go to bed right as I got home, instead of staying up to pack a lunch for the next day. Thus, are leftovers from dining out allowed? I concluded yes, since I did not want to see it go to waste, and I didn't think it would survive a freeze very well.

Before the fridge debacle, I was able to make hummus (and freeze it in the interim) with crackers! I've made hummus plenty of times in the past, but I've never made it with cooked-from-dried garbanzo beans.

Hummus (adapted from here)
What you need:
  • 2 cups (~one 15-oz can or ~1 cup dried) garbanzo beans + 1/4 cup of can liquid or cooking liquid
  • 4 Tbsp lemon juice
  • 3 Tbsp tahini paste
  • 2 Tbsp olive oil
  • 1/2 tsp salt
  • 1 clove garlic, minced
  • spices as desired; I like to add a few dashes of cumin and some red pepper flakes
What you do:
  1. Combine all of the ingredients except the garbanzo liquid into a food processor or blender; blend.
  2. Add some or all of the garbanzo liquid and blend until hummus comes together in a creamy goodness.

Everything Crackers (adapted from here)
What you need:
  • 2 cups AP flour
  • 1 Tbsp sugar
  • 1 tsp salt
  • 1/8 tsp ground black pepper
  • 2/3 cup milk or water (my milk didnot survive the fridge, so I used water)
  • 2 Tbsp chilled butter, cut into small pieces
  • "Everything" mix (a haphazard combination of kosher salt, poppy seeds, and granulated garlic and onion)
  • A couple of spritzes of water from a spray bottle
What you do:
  1. Preheat oven to 450° F.
  2. Combine the flour, sugar, salt, and pepper in a food processor and pulse a couple times until combined.
  3. Add the pieces of butter and process for a few seconds until the 
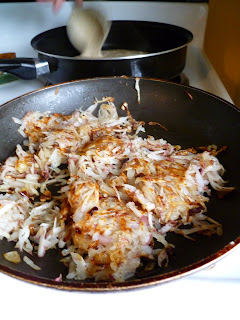
mixture becomes sandy.
  4. Add milk while the processor is running and run until fully incorporated.
  5. Knead dough on a lightly floured surface for 5-6 minutes.
  6. Divide the dough into sections and roll through a pasta machine (however you need to set it up...) to the second thinnest setting. You can also roll the dough out with a rolling pin, though be careful to roll evenly.
  7. Arrange dough pieces on an ungreasedbaking sheet and score with a knife or pizza cutter.
  8. Lightly spray the dough with water and sprinkle on your "Everything" mix.
  9. Bake for 10-12 minutes, until the edges of the crackers are light brown. Cool completely before eating or packaging (if they make it there).

Michael came over last night for dinner, and had suggested making a stir fry. As a sauce, I was thinking of just mixing some sesame oil, liquid aminos, and ginger. There's a delicious Korean-style teriyaki sauce in my "fridge" that I couldn't get out of my mind, so a quick internet search gave me this gem that I have adapted here:

Sweet and Savory Teriyaki Sauce
What you need:
  • 1 1/4 cups water
  • 1/4 cup liquid aminos or soy sauce
  • 2 Tbsp cornstarch
  • 3 Tbsp brown sugar
  • 1 garlic clove, minced
  • 1/4-1/2 tsp ginger powder
  • 1/4 tsp red pepper flakes
What you do:
Combine all of the ingredients in a small saucepan and put over low heat for 25 minutes or until desired thickness. Stir often.


Monday, August 1, 2011

August 1st


Day one! I approached the day with tenacity, and although my lunch consisted of raw veggies dunked in olive oil and balsamic vinegar (secondary to me getting home late last night following a 3 1/2 hour dance rehearsal and eating Rocky Rococo's pizza), it was surprisingly satisfying.

My first new item made: butter! It was one of the easiest and most delectable things I've made in a while.

What you need:
heavy cream
mason jar, or any other clear vessel with a tight-fitting lid

What you do:
Fill your vessel ~2/3 full with cream and pretend like you're in a Shake Weight commercial for ~10-15 minutes, until the buttermilk starts to separate from the butter solids. Then rinse with cool water until the water runs clear. Pack tightly in saran wrap and store in the refrigerator.

I lathered the butter on a fresh ear of corn; gotta love 'murica. I saved the buttermilk and am planning to use in scrambled eggs in the morning.

For the rest of the month, I'll be making butter in the food processor, but I thought I'd shake up some butter first for the experience. You should too.

DIY Challenge

During the month of August, I will be putting myself through a challenge to make everything that I consume. Through this month, I hope to gain an appreciation of the work that goes into preparing the foods I like to eat and the knowledge of exactly what I'm putting into my body.

At the outset, it seems like a daunting challenge. All challenges need rules, so here's what I've set out for myself:
  • I will make everything from scratch ...within reason. At this juncture, it is not currently within my means to milk my own cows, mill my own flour, press my own oil, etc. However, if I can take a step back in the process of preparing an item, I will (e.g. orange juice comes from oranges, and I can reasonably juice some oranges).
  • No canned or frozen fruits/veggies/beans/etc. I chose August as the month to do this, as fresh produce is plentiful in Wisconsin.
  • I will allow myself beer, wine, coffee, and tea, although someday I wish to venture into preparing each of these.
  • I will allow myself to eat out 3 times during the month. I'm only human, and there are so many good restaurants in Madison. Also, many celebrations and social events take place at restaurants, from which I would not like to exclude myself. I already have one restaurant excursion scheduled as an end-of-the-summer celebration for the med students who have been doing summer research projects in my lab.

So here it goes! I will be posting stories, pictures, and links to recipes. I am not a photographer, so please excuse my use of my point-and-shoot digital camera.